Here are some tutorials to so you how to design 'Stitch Me!'
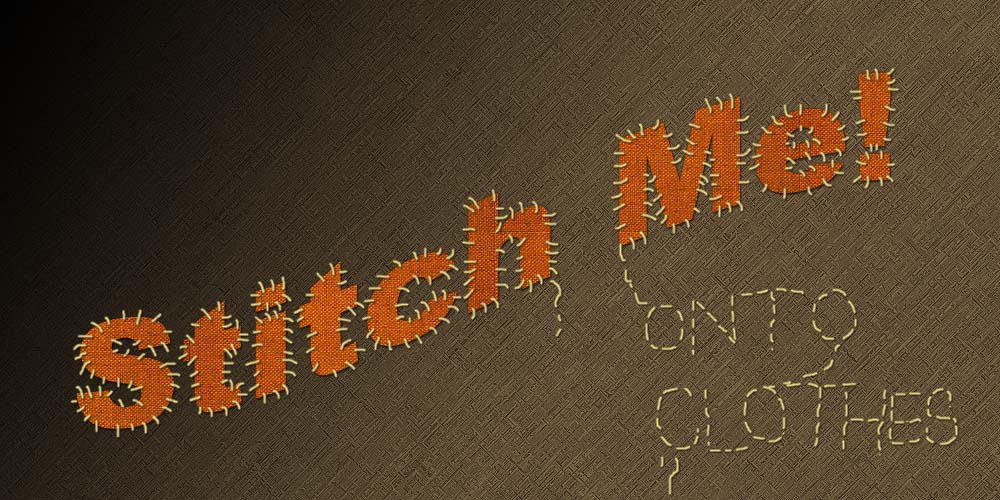 This is my own version of this tutorial. Stitch Me Design Create a new document:1000×500 pixels in size and fill it with colour of #402D24. Set up Foreground and Background colors as white and black accordingly and then apply Filter > Distort > Diffuse Glow with presets similar to these: 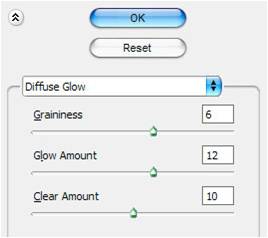 Press D to set Foreground and Background colors as standard. Then duplicate layer with Ctrl+J and apply another one Filter > Brush Strokes > Ink Outlines: 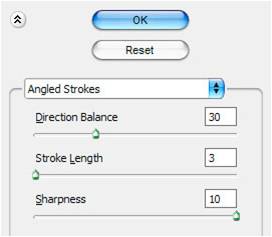 Change layer mode to Darken and set opacity to 30% up. Create a new layer, after that activate the Gradient Tool and a black to transparent gradient, fill in the work area as on picture below:  Next thing to do is add some text to our canvas. Get the Horizontal Type Tool out and write some text onto it. I’ve used Arial Black (130 pt, Sharp) for my font with a very thick weight/setting. Then use the following warp text properties for this layer: 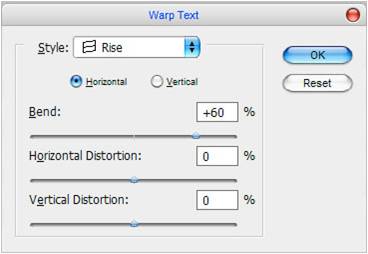 Move the text in the middle of canvas.
Now find some appropriate fabric texture. For this you might want to go to Google and search for a good-quality picture or use this one. Open this file, then apply Edit > Define Pattern to save it as pattern and close the document. Go back to main document and apply Pattern Overlay layer style to the text layer: 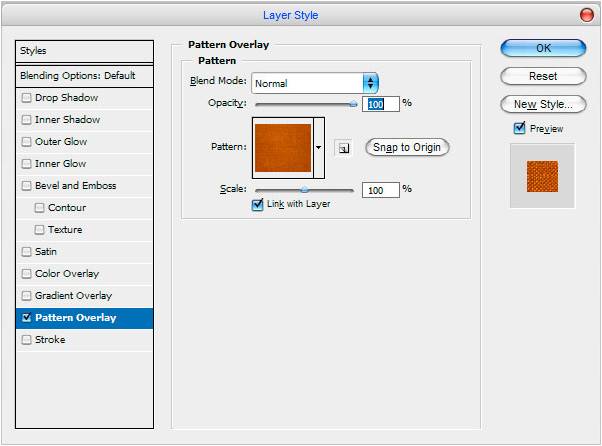 |